
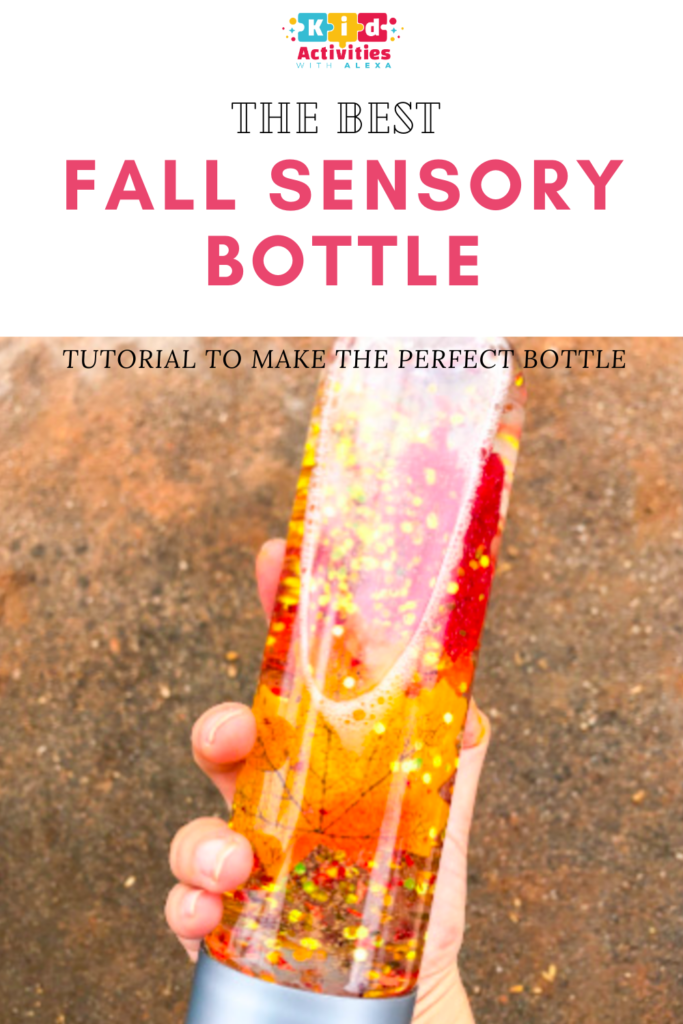
Bring the colors of autumn indoors with this easy fall sensory bottle filled with colorful leaves and sparkling sequins.
This is one of my favorite fall sensory bottle ideas because it is simple to assemble and can be used in several ways. Babies can explore it during supervised tummy time, toddlers can shake and observe it, and preschoolers can use it as a quiet-time or calm-down tool.
You only need a few supplies—and you can control how quickly or slowly everything moves inside the bottle.
Why Make a Fall Sensory Bottle?
A sensory bottle gives young children something interesting to observe without requiring complicated instructions or a perfectly planned lesson.
As children turn, shake, and roll the bottle, they watch the leaves and sequins travel through the liquid. This encourages visual attention and gives them an opportunity to practice tracking moving objects with their eyes.
You can also use the bottle to introduce simple fall vocabulary. Talk about the colors, count the leaves, or describe how the objects move:
- “The red leaf is floating.”
- “The sequins are falling slowly.”
- “Can you find the orange leaf?”
- “What happens when we turn the bottle over?”
This turns a simple sensory experience into a playful language activity.
Watching the pieces slowly settle can also create a gentle pause during transitions or moments when your child needs help slowing down. A sensory bottle will not teach a child to manage every big emotion, but it can be a useful visual tool while you stay nearby and help them regulate.
Fall Sensory Bottle Supplies
You will need:
- One clear plastic bottle with a secure lid
- Three small faux fall leaves
- Red, orange, or gold sequins
- Clear school glue
- Water
- Strong glue for sealing the lid
I used a clear VOSS water bottle because its smooth sides make it easy for children to see what is happening inside. Any sturdy, clear plastic bottle will work.
You can also add a small amount of fall-colored glitter, but avoid adding too many decorations. If the bottle is overcrowded, it becomes difficult to see the leaves.
How to Make a Fall Sensory Bottle
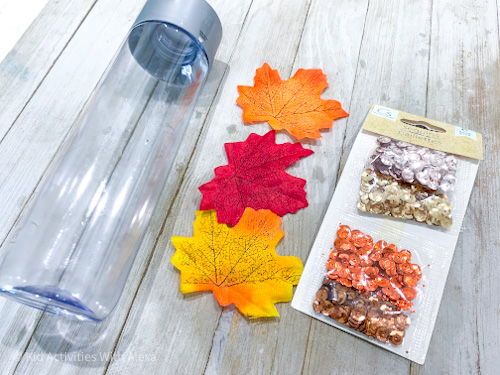
1. Fill the bottle with water
Fill approximately three-quarters of the bottle with water. Leave room for the glue and decorations.
2. Add the fall leaves
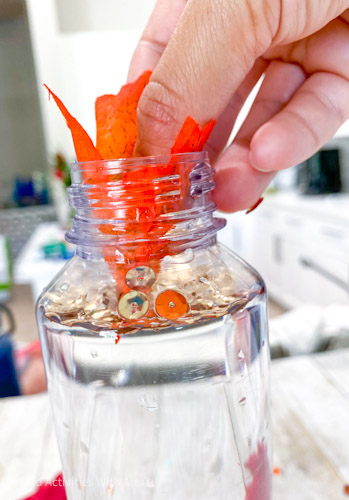
Fold or roll the faux leaves carefully so they fit through the bottle opening. Add about three leaves.
Using only a few leaves helps each one remain visible as it moves around the bottle.
3. Add the sequins
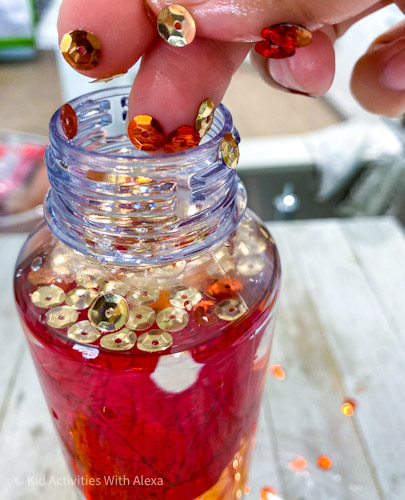
Add a small amount of red, orange, or gold sequins.
Start with less than you think you need. You can always add more, but too many sequins may hide the leaves and make the bottle look cluttered.
4. Add clear glue
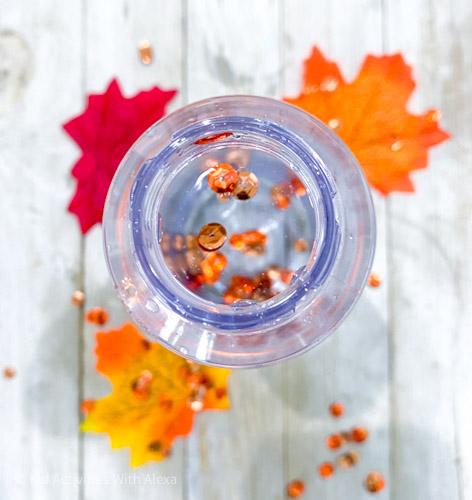
Fill most of the remaining space with clear glue. Leave a small air pocket at the top so the liquid can move when the bottle is turned.
Place the lid on the bottle temporarily and test it before sealing it permanently.
5. Adjust the movement
Turn the bottle upside down and observe how quickly the leaves and sequins fall.
- If they fall too quickly, add more clear glue.
- If they move too slowly, add more water.
- If the bottle is too full, remove a small amount of liquid before making adjustments.
There is no perfect speed. Some children enjoy watching the pieces drift very slowly, while others prefer more movement. Experiment until the bottle creates the effect you want.
6. Seal the bottle
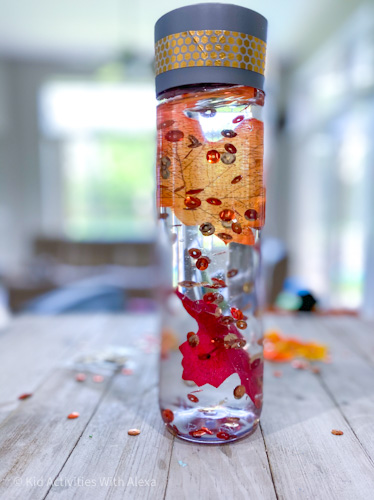
Once you are happy with the movement, dry the bottle opening and secure the lid with strong glue.
Allow the glue to dry completely before giving the bottle to your child. Always supervise babies and toddlers while they use a sensory bottle, and check it regularly for cracks or leaks.
Can I Use Clear Soap Instead of Glue?
Yes. Clear hand soap or dish soap can be used to slow the decorations, but I prefer clear school glue.
Soap is usually thinner, so you may need to use more of it. It can also create bubbles or foam when your child shakes the bottle. Clear glue produces fewer bubbles and makes it easier to adjust how slowly the pieces fall.
Whichever liquid you choose, test the bottle before sealing it.
What Children Learn from This Fall Sensory Bottle
This activity may look simple, but there is a lot of learning happening as your child shakes, turns, and observes the bottle.
Visual Tracking
As the leaves and sequins move through the liquid, children practice following moving objects with their eyes. This is called visual tracking—an important visual skill later used when reading, writing, catching a ball, and moving safely through a space.
Cause and Effect
When your child shakes or turns the bottle, everything inside begins to move. When the bottle remains still, the pieces slowly settle. This helps toddlers explore a basic scientific idea: their actions can cause something else to happen.
Try saying:
- “You shook the bottle, and the leaves started moving!”
- “What do you think will happen if we turn it over?”
- “How can we make the sequins move again?”
Language Development
Sensory play creates natural opportunities to introduce new words. As your child explores, describe the colors, objects, positions, and movements you see.
You might use words such as:
- Fall and autumn
- Leaf and leaves
- Red, orange, yellow, and gold
- Fast and slow
- Up and down
- Floating, falling, shaking, and swirling
Toddlers learn language by hearing words used repeatedly during meaningful experiences. They do not need to repeat every word or answer every question for learning to occur.
Early Math Skills
Invite your child to count the leaves or compare how quickly different objects move. You can also talk about which objects are at the top, bottom, or middle of the bottle.
These simple conversations introduce counting, comparison, and positional vocabulary without turning the activity into a formal lesson.
Attention and Concentration
Watching the pieces move and slowly settle encourages children to focus on one experience for a short period. They may shake the bottle repeatedly as they test different movements and observe what changes each time.
Fine-Motor and Coordination Skills
Grasping, lifting, turning, rolling, and shaking the bottle engages the hands, wrists, and arms. These movements help young children practice coordination and controlled movement.
Choose a lightweight plastic bottle that your child can hold comfortably with both hands.
Seasonal Awareness
A fall-themed sensory bottle introduces the colors and symbols associated with autumn. Pair it with a nature walk so your child can compare the pretend leaves inside the bottle with real leaves outside.
The goal is not to quiz your child. Simply noticing, describing, and exploring together is enough.
Tips and Tricks for the Best Fall Sensory Bottle
Add the Decorations Before the Glue
Begin with water, leaves, and sequins. Add the clear glue gradually so you can control how slowly everything moves.
Use Only a Few Leaves
Three small faux leaves are usually enough. Too many leaves can stick together, block the view, or become trapped near the top of the bottle.
Start with Fewer Sequins
A little goes a long way. Begin with a small pinch and test the bottle before adding more. Too many sequins can hide the leaves and make the bottle appear crowded.
Adjust the Speed Before Sealing
If the decorations fall too quickly, add more clear glue. If they barely move, remove a little of the mixture and add more water.
There is no single correct ratio because different types of glue, sequins, and decorations move differently.
Leave a Small Air Pocket
Do not fill the bottle completely to the top. A small amount of air gives the liquid room to move when your child turns or shakes the bottle.
Remove Air Bubbles
After mixing the bottle, let it sit with the lid loosely attached. Many small bubbles will rise and disappear on their own. Check the liquid level again before sealing it permanently.
Avoid Adding Too Much Glitter
Fine glitter can make the water cloudy and obscure the larger decorations. If you want extra sparkle, add a very small amount or use larger sequins instead.
Use a Funnel
A small funnel makes adding sequins and liquid easier and helps keep glitter and glue off your work surface.
Protect Your Table
Make the bottle on a tray, baking sheet, or washable tablecloth. This will contain spills and make cleanup much easier.
Test for Leaks
Before giving the bottle to your child, close it tightly and turn it upside down over a sink. Check the lid and bottle for any leaks.
Seal the Lid Securely
For babies and toddlers, secure the lid with strong glue and allow it to dry completely. Always treat the bottle as a supervised activity—not a toy for a crib, bed, or unattended play.
Use Plastic, Not Glass
A clear plastic bottle is safer for young children and easier for small hands to lift. Replace the sensory bottle if the plastic cracks, becomes damaged, or turns cloudy.
Make It Easier for Small Hands
If a full-size bottle feels too heavy, use a smaller clear plastic bottle and add fewer decorations. Your child should be able to hold and turn it without struggling.
Ways to Use Your Autumn Sensory Bottle
Once your fall sensory bottle is finished, try using it during:
- Supervised tummy time
- Quiet play
- Story time
- Morning basket activities
- Transitions between activities
- A fall-themed preschool lesson
- Calm-down time with a trusted adult
You can also place the bottle in a sunny area and watch how the light reflects off the sequins.
For an easy matching activity, take the bottle outdoors and look for real leaves in similar colors. This helps children connect the objects inside the bottle with the seasonal changes they see outside.
Fall Sensory Bottle Questions for Toddlers
Keep the conversation playful by asking simple questions:
- What colors can you see?
- How many leaves are inside?
- Which leaf is moving fastest?
- What happens when you shake the bottle?
- Can you make the sequins move slowly?
- Can you find something outside that is the same color?
Your child does not need to answer every question. The purpose is to introduce descriptive words while you explore together.
A Simple Fall Activity for Quiet Play
This fall sensory bottle is an easy way to explore autumn colors, movement, and seasonal vocabulary through play.
You do not need to turn it into a formal lesson. Make the bottle, place it where your child can reach it with supervision, and let curiosity lead the activity.
The most important learning often happens in the simple moments: shaking the bottle, watching a leaf float, noticing a color, and wondering what will happen when it is turned over again.
More Fall Activities for Toddlers
Continue your autumn theme with these playful ideas:
- Easy Fall Leaves Wreath Craft
- Fall Sensory Bins for Babies
- Pumpkin Spice Playdough Recipe
- Apple-Scented Playdough Recipe
Want More Than One Activity?
My free month-by-month toddler and preschool curriculum turns simple activities like this into an easy learning rhythm. You will get seasonal play ideas, book recommendations, and age-appropriate skills—all organized so you do not have to plan everything yourself.
Start with the free toddler curriculum →
Fall Leaves Sensory Bottle

Notes
If you want the sequence to fall slower add more clear glue to the bottle
If you want the sequence to fall faster then add more water
Clear glue can be replaced with clear dish or hand soap.
Ingredients
- Plastic bottle
- 3 fall faux leaves
- Clear glue
- Red and gold sequence
Instructions
- Empty 1/4 of the water from the bottle out
- Add three fall leaves
- Add red and gold sequence
- Add 1/4 of clear glue and close the bottle
- Shake the bottle – the sequence should fall slowly when the bottle is put upside down
1 thought on “How to Make a Fall Sensory Bottle with Leaves”
Comments are closed.