Baby it’s cold outside! And it’s time to make homemade ornaments for the tree! This air drying clay is so easy to make with ingredients you probably already have at home, you will love making it a tradition every year. Best part? There is no cooking involved!
Air Clay Recipe Ingredients
- 2 cups of cornstarch
- 1 cup of white school glue
- 1 Tablespoon of baby oil
- 1 Tablespoon of white vinegar
- 1 teaspoon of body/hand lotion
- Cookie cutters
- Parchment paper
Homemade air clay recipe

Step 1: gather your supplies
- 2 cups of cornstarch
- 1 cup of white school glue
- 1 Tablespoon of baby oil
- 1 Tablespoon of white vinegar
- 1 teaspoon of body/hand lotion
- Cookie cutters
- Parchment paper
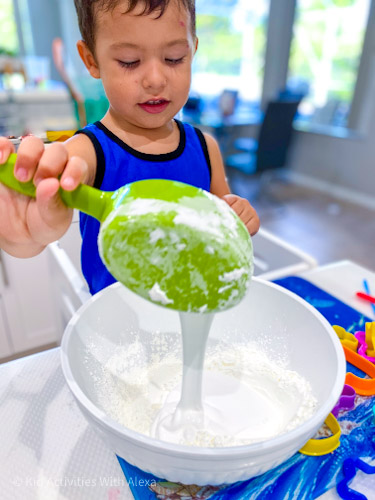
Step 2: Add the cornstarch
Use a large bowl and pour the cornstarch into it.

Step 3: add the rest of the ingredients
Add in the white glue to the mixture, followed by the vinegar, baby oil and lotion.
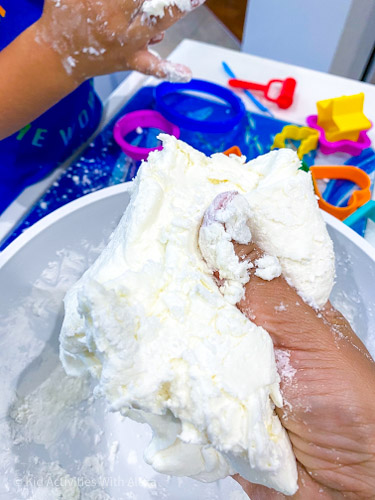
Step 4: knead like a playdough
Mix all ingredients and mix them with a spoon. When you can’t mix anymore knead the mixture with your hand until you get a Playdough consistency. It will be crumbly at first but keep kneading until you can take it out of the bowl and flatten it with a rolling pin.
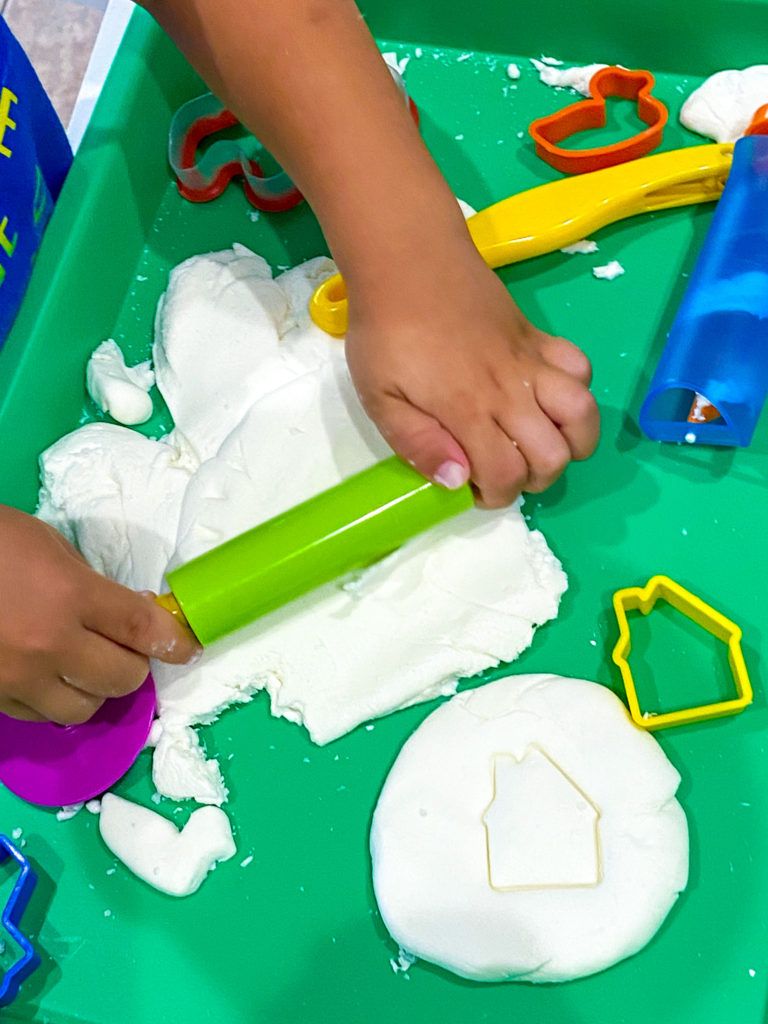
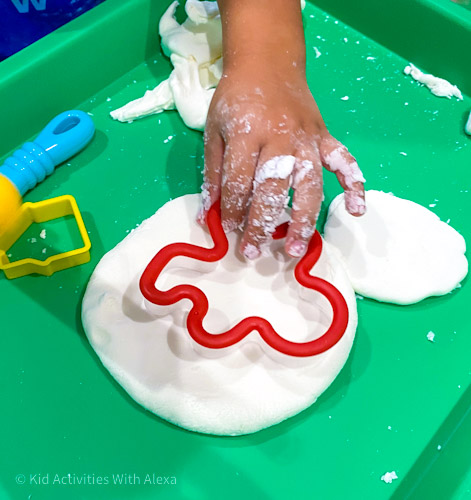
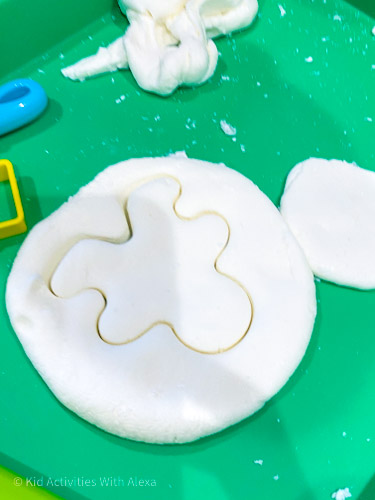
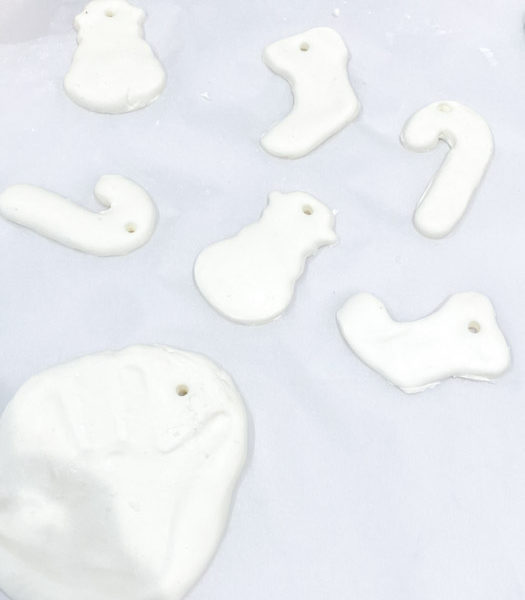
Step 5: Make your designs
Flatten the dough with a rolling pin to make an even surface. Use cookie cutters to make your designs.
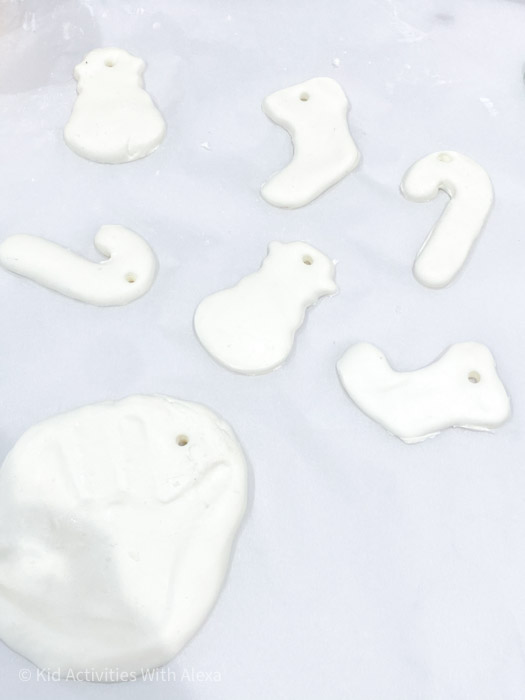
Step 6: let your Design Air Dry
Once you are done with your design, place them over parchment paper. Let them dry for 24 hrs before using acrylic paint to paint your designs.
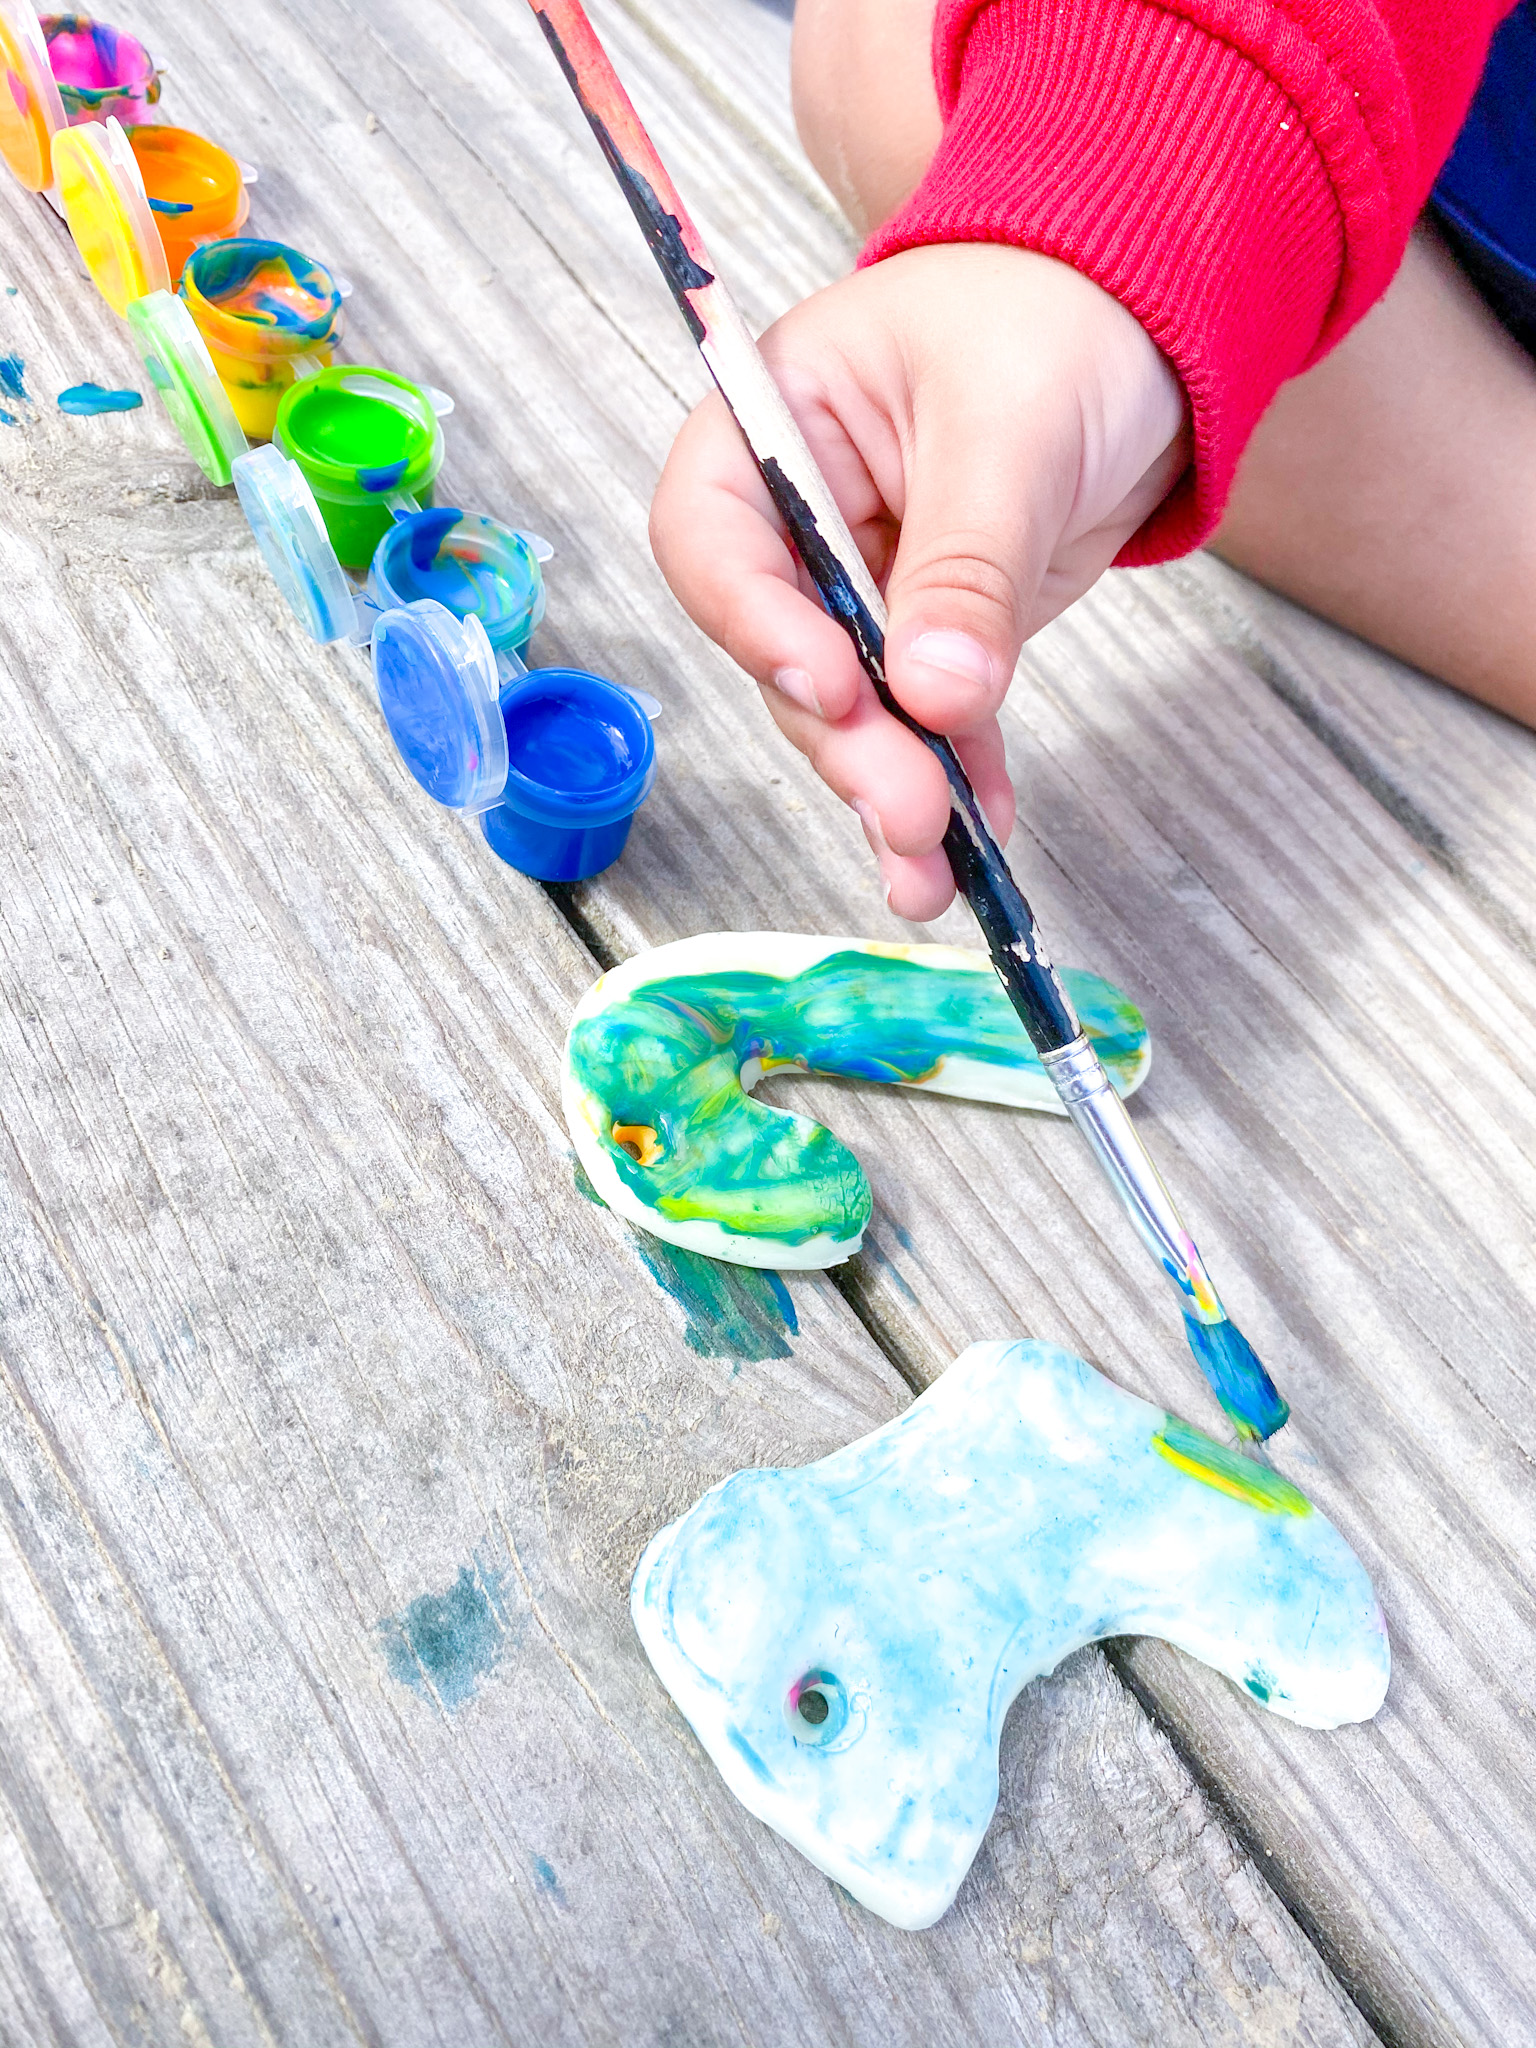
Step 7: Paint your clay
After letting the clay dry, grab your favorite acrylic paint and a paintbrush to color and design your clay.
Get Creative!
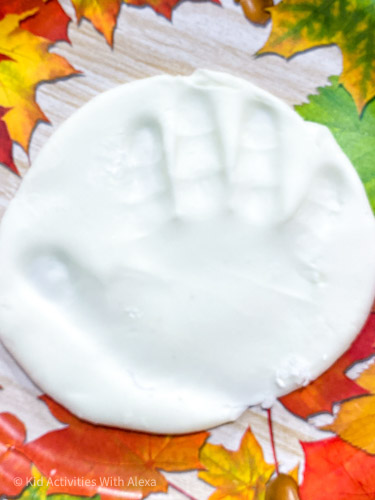
A favorite design we use every year is our kid’s handprint. There is something about handprint decorations for the tree that I love! Is like capturing this moment in time and freezing it forever!
My tips and learnings
If you feel your dough is a bit sticky, you can add some extra cornstarch.
A quickly because this dough hardens fast as the glue starts to dry out.
The first time I did this recipe I placed my ornament in a paper plate and a second batch in a ceramic plate to dry. Well…. both of them got stuck to the plates! So make sure you use the parchment paper to dry your creations. This will let your creations dry but not stick to them.
The second time I did the batch, I used a different hand lotion and I’m not sure if that had something to do with it, but the dough expanded and the hole I made to place the ornament string closed up a bit. Thank goodness I found out after an hour of leaving them to dry and I was able to fix them. The dough was still soft so it wasn’t hard to pass the straw again.
I had to do this twice for some of the ornaments, not sure why they kept wanting to close up! But nothing that a good old plastic straw couldn’t fix perfectly!
Leftover clay? Sorry! Can’t save it! I tried. I wrapped in plastic and put it in the refrigerator and that didn’t work either. My advise, do simple shapes with remaining clay that you can let dry and use for a sensory set activity later on. Do hearts and use them for Valentine’s Day.
Last thoughts
There is no messing up! I can’t wait to see what you create! Do not limit yourself to Xmas tree ornaments, this is an air drying clay that can be used in so many sensory activities.
Print the recipe!
Air Drying clay recipe
Notes
Only place your designs on parchment paper, any other materials and your design will stick to them.
Ingredients
- 2 cups of cornstarch
- 1 cup of white school glue
- 1 Tablespoon of baby oil
- 1 Tablespoon of white vinegar
- 1 teaspoon of body/hand lotion
- Cookie cutters
- Parchment Paper
Instructions
- Use a large bowl and pour the cornstarch into it.
- Add in the white glue to the mixture, followed by the vinegar, baby oil and lotion.
- Mix all ingredients until you get a Playdough consistency. It will be crumbly at first but keep kneading until you can take it out of the bowl and flatten it with a rolling pin.
- Flatten the clay with a rolling pin to make an even surface.
- Use cookie cutters to carve your designs or create your own as if it were pottery.
- Once you are done with your design, place them over parchment paper.
- Let the dry 24 hrs before using acrylic paint to paint your designs.