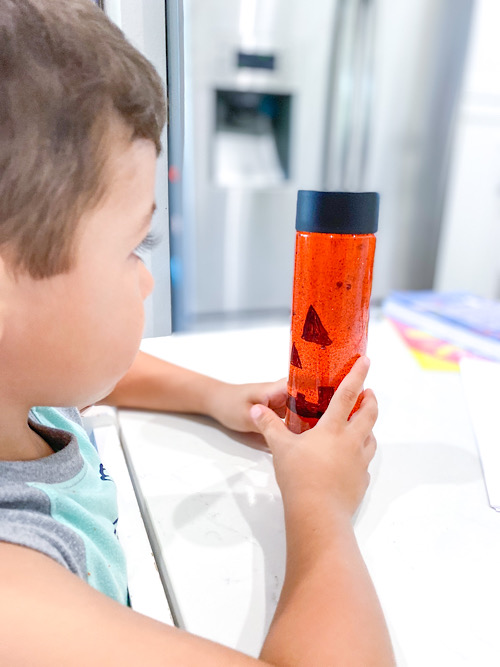
I love to make sensory bottles! They are so much fun for babies, toddlers, and even kids of all ages. They help with visual tracking in babies, calming strategies for toddlers, fine motor skills, creativity, and even make pretty decorations for the season. They are easy to make and there is no wrong way of doing them, so what’s not to love!
Let’s create a pumpkin-themed bottle to celebrate fall! and if you are feeling in the fall mood then you can do our famous Fall leaves Sensory bottle next!
SUPPLIES NEEDED:
- Clear plastic bottle (preferrably with a flat top – We have these sensory bottles from Amazon or you get a Voss bottle at your local grocery store)
- Orange food coloring (available in Amazon)
- Copper Tube confetti or small confetti
- Brown Glitter
- Clear Elmer’s Glue
- Black Sharpie Permanent Marker

The trick to making a perfect sensory bottle using what you already have is to use a mixture of fine glitter with a bigger element such as foil confetti or sequences. Use a mixture o two colors as well.
PRINT OUT RECIPE: HOW TO MAKE PUMPKIN SENSORY BOTTLE USING GLITTER
Pumpkin Sensory Bottle using glitter
Notes
The amount of clear glue is what is going to determine how fast or slow the glitter and sequence will fall. More glue = slower glitter falling down.
Ingredients
- Clear plastic bottle
- Orange food coloring
- Copper Tube confetti or small confetti
- Brown Glitter
- Clear Elmer’s Glue
- Black Sharpie Permanent Marker
Instructions
- Fill the water with warm water
- Add 1/4 of clear glue and close the bottle to dilute the water and flue
- Add brown glitter and sequence
- Shake the bottle – the sequence should fall slowly when the bottle is put upside down
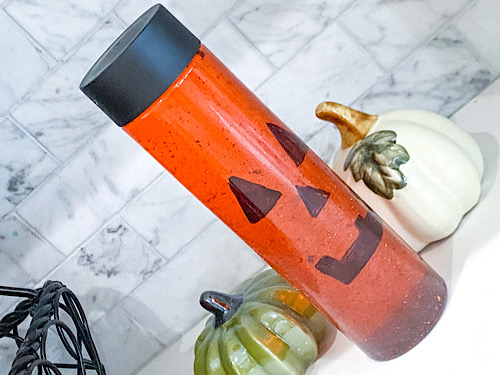
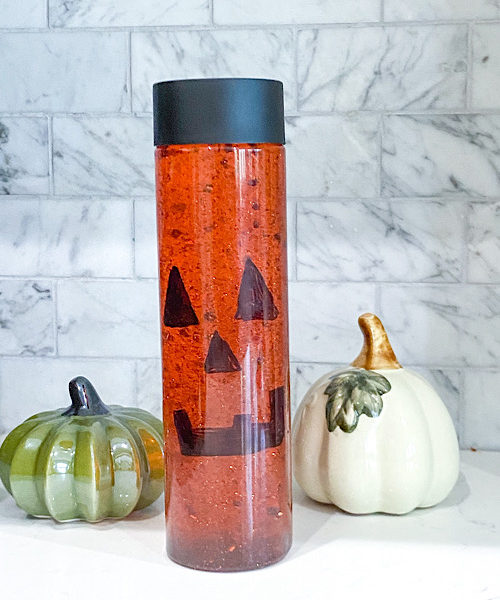
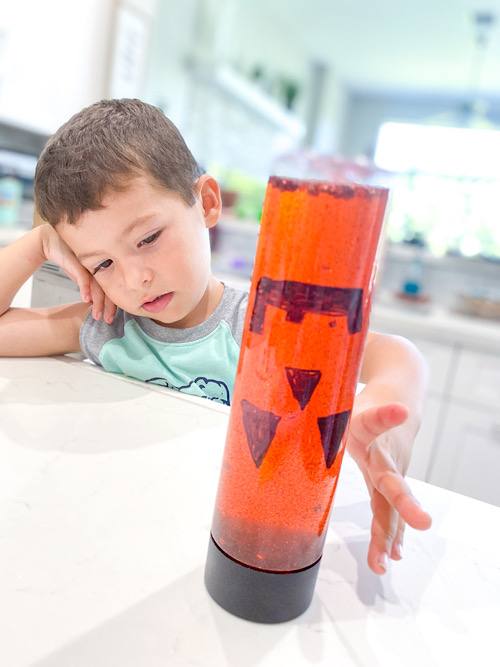
- Draw a pumpkin face using a black sharpie
- Close, shake, and play!
PHOTO STEP BY STEP TUTORIAL: HOW TO MAKE PUMPKIN SENSORY BOTTLE
Step 1 – Gather Supplies
- Clear plastic bottle (preferrably with a flat top – We have these sensory bottles from Amazon or you get a Voss bottle at your local grocery store)
- Orange food coloring (available in Amazon)
- Copper Tube confetti or small confetti
- Brown Glitter
- Clear Elmer’s Glue
- Black Sharpie Permanent Marker
Step 2 – Prepare the liquids
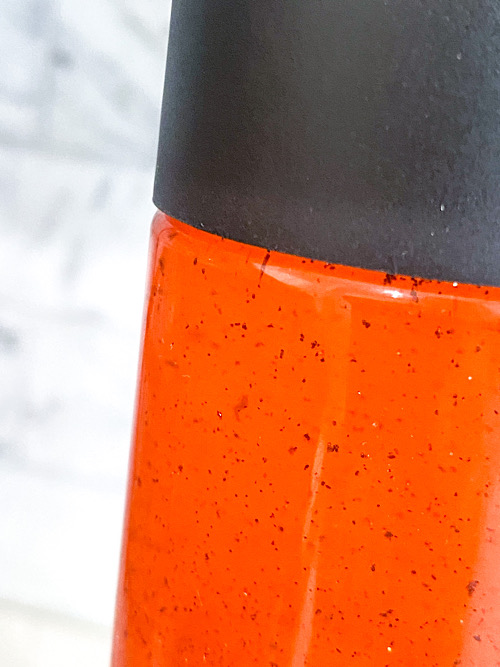
Fill up your bottle with about 1/4 with clear glue. Do not use white glue as the bottle wont have that transluscent effect.
Add 1-2 drop of orange food coloring. Be careful with adding too much color as it will make the water very dark and the glitter wont show.
Step 3- Add Glitter
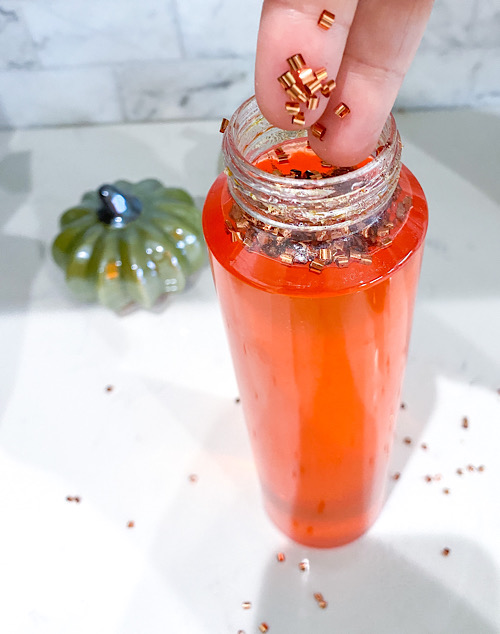
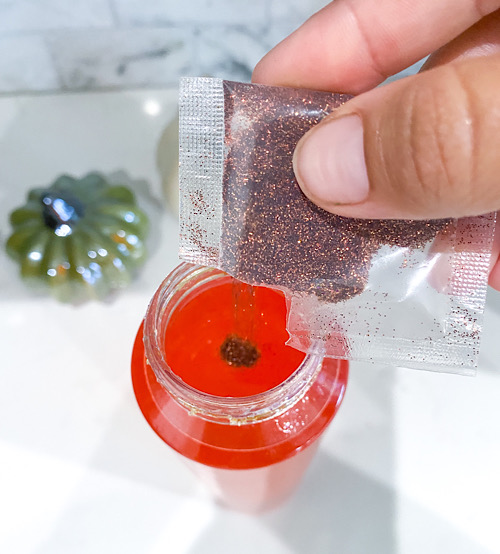
Now that you have the perfect orange color, add about 1 tablespoon of glitter to the bottle and 1 tablespoon of tube conffetti. If you do not have tube conffetti you can replace it with sequence or foil confetti.
Close and shake your bottle to see if you like the speed of the glitter falling down. The more clear clue you add, the denser the water will get and the slower the glitter and confetti will fall. Heavier items like confetti will fall faster than lighter ones – the fine glitter.
The combination of having these two weights will give dimension to your bottle.
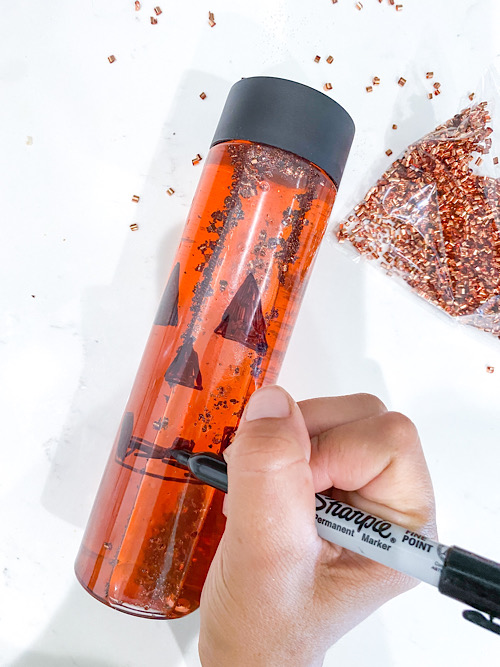
step 4 – Add the embellishments
Using a sharpie, draw in the pumpkin face. Three simple triangles and a silly mouth will do!
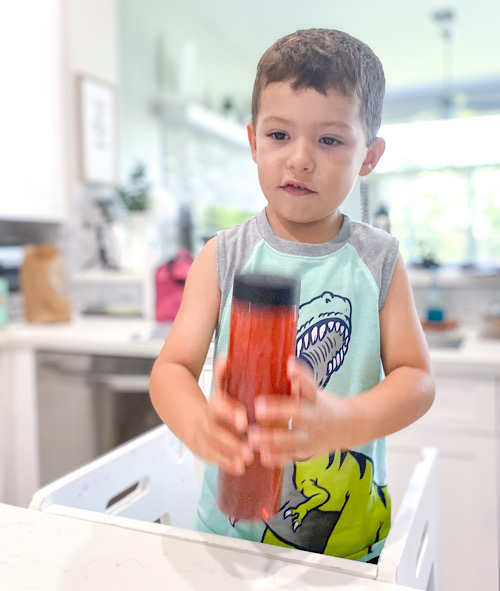
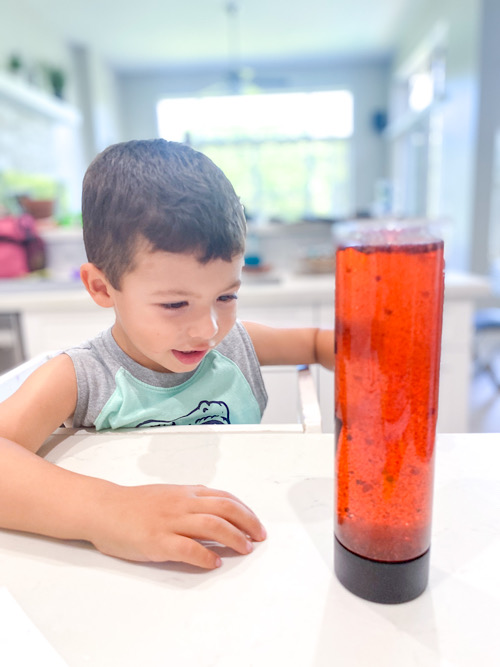
Step 5- shake and enjoy
To seal your bottle and avoid toddlers wanting to open it and spill all of its contents, you can add some permanent superglue to the lid. Otherwise, you can just close it, shak
e it and enjoy!
Make more!
Did you know that if you use the same recipe system you can get very creative with your bottles?
We created another spoooky bottle to place next to this one using a smaller bottle using a plastic jar from the dollar store, added some purple food coloring, purple and silver glitter. We added a plastic bone and a spider ring for it’s spooky feel!
In the mood for more Halloween ideas? check these out!
- 12+ Halloween art Ideas for toddlers
- Frozen Spider Halloween Sensory Bin
- Witches Brew Halloween Science Experiment for toddlers
Never miss another fun and easy-to-make sensory recipe! Catch up on what we are doing live on Instagram or Facebook or become a member and learn how to use sensory activities to teach at home.