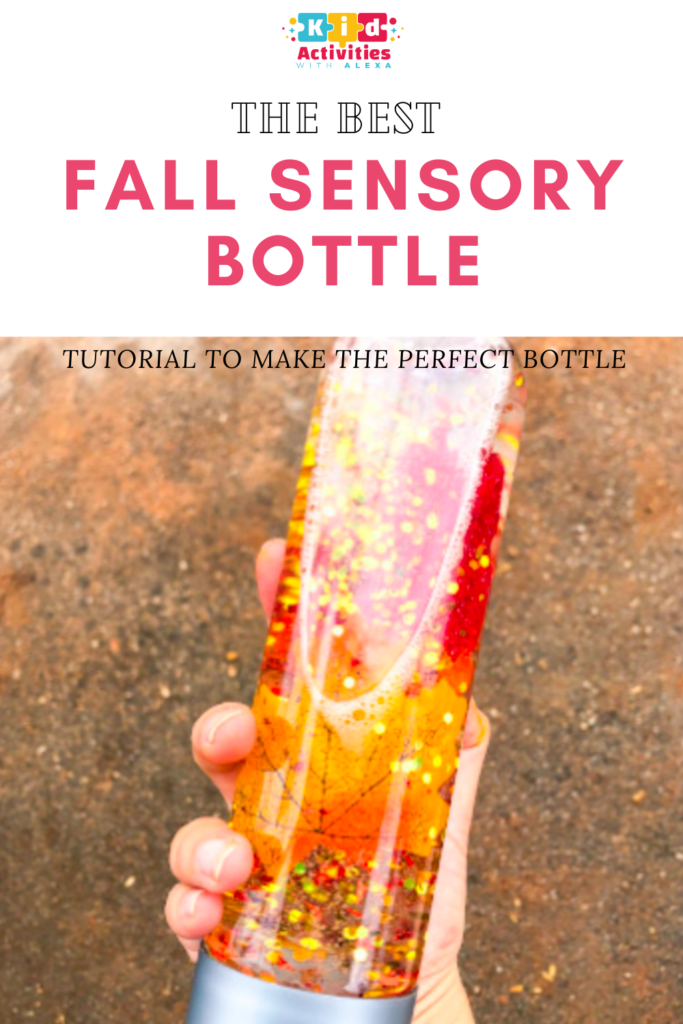
Do you see that? The leaves are falling, the weather is cooling and there are pumpkin spice pastries everywhere! It is also time to make fall crafts! One of my favorites is this fall sensory bottle.
I have done a workshop, Instagram lives, and in-person classes to teach moms how to make the perfect sensory bottle, but this fall leaves sensory bottle is still a favorite! Today you will be able to make it too!
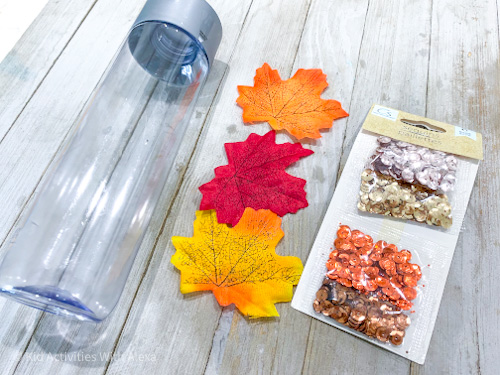
Supplies needed:
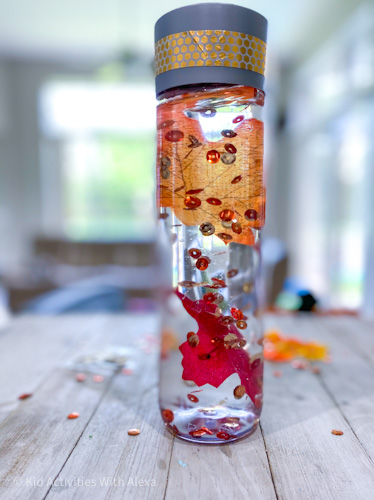
- Clear plastic bottle (this one is a Voss bottle)
- 3 faux fall leaves
- Red and Gold sequence
- Clear Elmer’s Glue
Making sensory bottles is a lot of fun. They are a great tool for kids of all ages. Babies use them for tummy time expertise, toddlers use them for visual tracking and eye-sight development and older kids use them as calming tool.
How to make a fall sensory bottle
Save this recipe and print it!
Fall Leaves Sensory Bottle
Notes
If you want the sequence to fall slower add more clear glue to the bottle
If you want the sequence to fall faster then add more water
Clear glue can be replaced with clear dish or hand soap.
Ingredients
- Plastic bottle
- 3 fall faux leaves
- Clear glue
- Red and gold sequence
Instructions
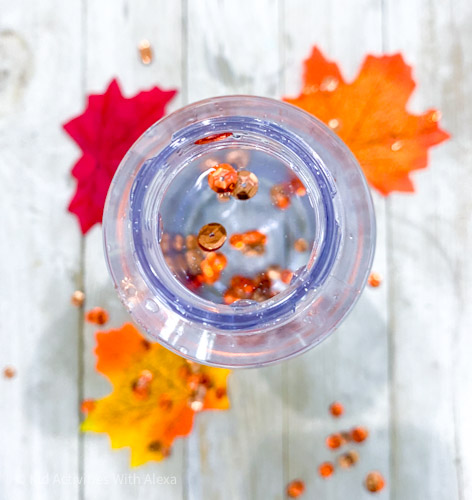
- Empty 1/4 of the water from the bottle out
- Add three fall leaves
- Add red and gold sequence
- Add 1/4 of clear glue and close the bottle
- Shake the bottle – the sequence should fall slowly when the bottle is put upside down
Did you know that sensory bottles are also called calm down bottles?
When a sensory bottle has items such as glitter in it that move slowly, children (and adults) are often mesmerized by watching their slow descent and this calms their breathing and helps them regulate themselves and their emotions.
Sensory bottles are used for therapy in different centers and can be made with different themes. You can make the glitter fall slower or faster using more or less glue.
Step by Step photo TUTORIAL: Fall leaves sensory bottle
Sometimes is easier if we can visually see the process of making something. We do it with cooking recipes so why not with sensory recipes too.
Here are the step by step process you can follow when making your own fall leaves sensory bottle.
Step 1 – Gather Supplies
- Clear plastic bottle (this one is a Voss bottle)
- 3 faux fall leaves
- Fall colors sequence
- Clear Elmer’s Glue
Step 2 – Prepare the liquids
Every sensory bottle personality is shown for the speed the sequins fall down. There is no perfect sensory bottle. After hosting numerous workshops and virtual tutorials I learned that the perfect sensory bottle is different for everyone. I like the sequence to fall a bit fast while you might get a more calm feeling when the sequence, glitter, and items inside fall slower.
So, how do we manage the speed? we use glue or soap for that.
Start 3/4 of water into your bottle and add the fall leaves and shake the bottle around.

step 3 – Add the embellishments
Now start adding the sequence and glitter. Do a little bit at a time to make sure you get the right amount of the sequence that you want. Too many and you will hide the leaves.
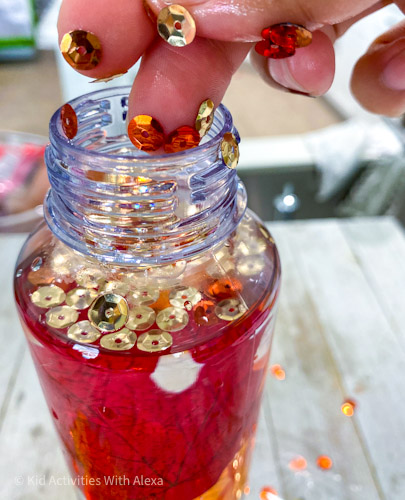
Step 4 – Add the Activator
The activator is what you will add to your bottle to make the embellishments and glitter fall slower. My preference is using clear glue.
Add 1/4 of clear glue, leaving some space at the top for air. Air is important as this will allow the liquid to move around when you flip the bottle.
Why I don’t like to use soap as my Activator
Clear glue is not the only activator you can add to make your embellishments fall down. You can use hand soap, dish soap and even gel. I like clear glue even though it does turn the bottle a bit cloudy. If you add a bit of food coloring that will disappear. If you don’t add food coloring like our bottle here, the cloudiness is not that much and you won’t notice it after a while.
Soap is more accessible and cheaper than clear glue. So if you are trying to make a sensory bottle, it might be that you have easier access to clear soap.
Soap is thinner, therefore, you will need to use more to slow down your embellishments.
I don’t like to use the soap because it creates foam at the top. Is not a big deal, it hides under the top but in my opinion, it clouds the view when you are shaking the bottle. It just annoys me. I rather use glue. I get the same effect of slowing down the bottle and avoid the bubbles.
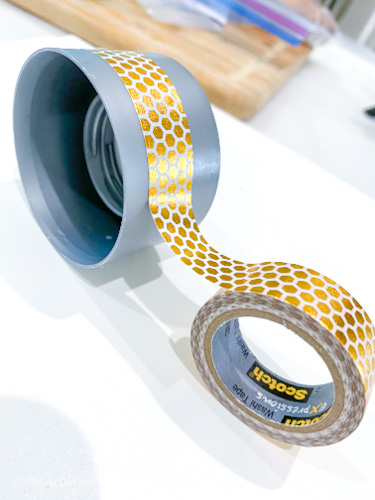
Step 5 – Add decorative details
Once you have your bottle embellishments falling at the speed you want, you can close the bottle. If you have little kids, super glue the top so they won’t be able to open it. the last thing you want is water, glitter, and glue all over your floor.
As an added option, you can finish off your bottle with some design. Some people like o decorate the bottle, others add washi tape to the top.
Step 6- shake and enjoy
Your bottle is complete! I love fall sensory bottles because they are like freezing one of my favorite seasons in a bottle. Place your bottle at the table as a decorative piece, use it with the kids as a calming bottle or place it on it’s side for a baby to do tummy time.
Remember, making the perfect fall leaves sensory bottle means you get the speed of your materials to fall faster or slower as you wish. Heavier objects will fall faster than lighter ones. Test your bottle before sealing it and have fun!
In the mood for more fall ideas? check these out!
- Easy Fall Leaves Wreath Craft
- Awesome Fall sensory Bins for Babies
- Pumpkin Spice Playdough Recipe (no cook)
- Apple Scented Playdough Recipe to Welcome fall
Never miss another fun and easy-to-make sensory recipe! Catch up on what we are doing live on Instagram or Facebook or become a member and learn how to use sensory activities to teach at home.
Like it? Love it? Let me know by sharing it?
1 thought on “How to make a Fall leaves sensory bottle”
Comments are closed.