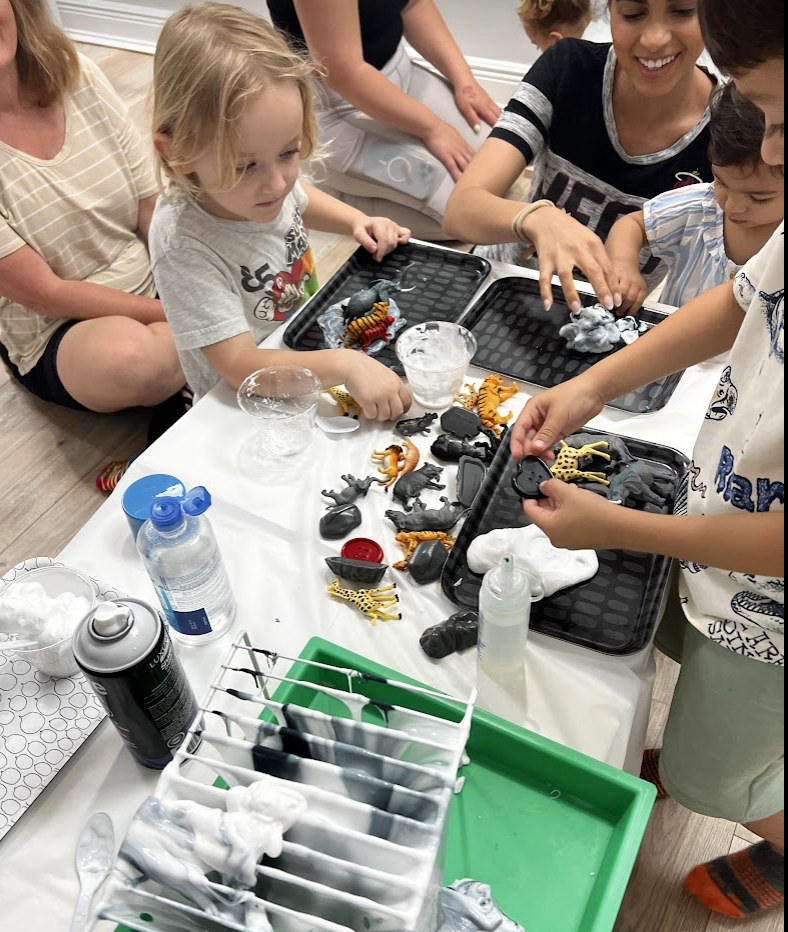
For a zoo sensory activity, we did this perfect slime recipe and you need to try it too!
We first saw the idea on Pinterest and thought it was a perfect idea to make with the kids in class.
See how I did the slime in under 7 minutes and a few video clips from class! It was a total success.
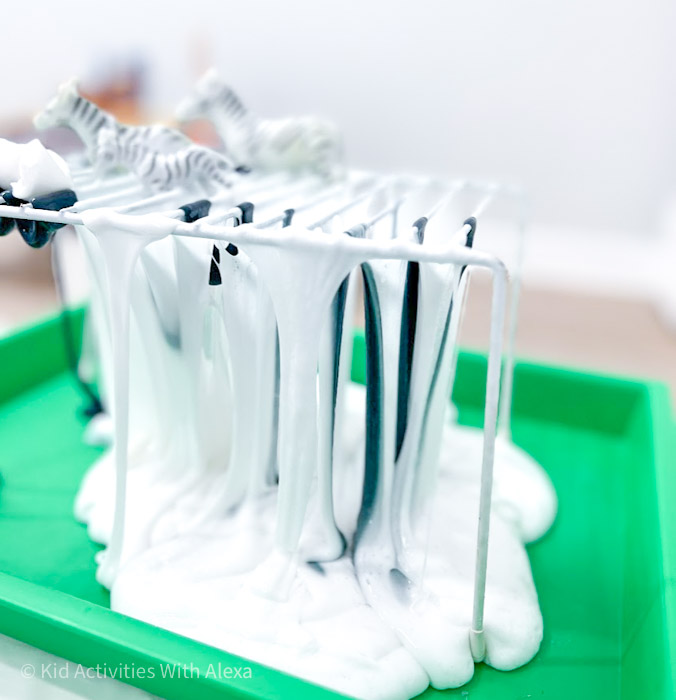
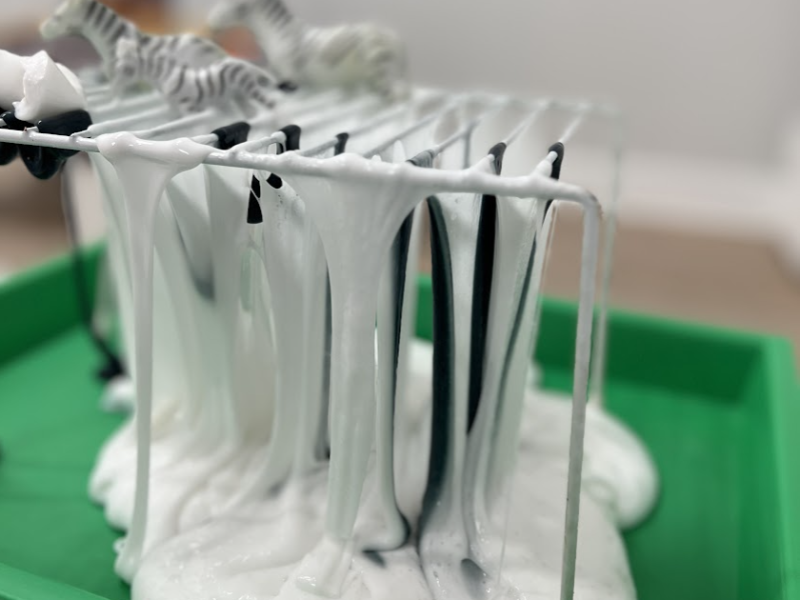
The black and white stripe effect of the zebra slime won’t last indefinitely. Once you mix the two, it will just turn grey.
Follow the recipe below for a non-sticky slime recipe or watch the video for a more stretchy slime recipe version to do with older kids.
ZEBRA SLIME RECIPE
Zebra Slime Recipe
Notes
You can replace the borax mixture with a contact lens solution – just make sure the contact lens solution has boric acid (borax) in the ingredients. You also will need a bigger quantity as contact lenses has the borax diluted.
Ingredients
- 1/3 cups of white glue
- 2 tsp of borax
- 1/2 cup of boiling water
- Black Food coloring
- Shaving cream
- 1 of boiling water
- 2 bowls
- Ziplock bag
Instructions
- Boil around 1/2 cup of water.
- Once the water is boiled, mix 1 cup of white school glue with ½ cup of water.
- Mix with a spatula in a mixer to combine the water and glue together.
- On a separate bowl, add 2 teaspoons of borax and combine with 1/2 cup of boiling water.
- Mix well until the borax is dissolved.
- Add the borax mixture to the glue mixture 1/4 cups at a time (we did about 5 spoonfuls until the glue was no longer sticking to the sides of the cup)
- Stir with a spoon slowly to get the glue to absorb the borax mixture.
- Once the water has cool down a bit, start mixing the glue with your hand. I like to squeeze and stretch to allow the glue to spread apart and absorb any liquid.
- Continue this process of squeezing the glue with the palm of your hand. Continue stretching the slime until all the liquid has been absorbed.
- To make the slime fluffy add 1/2 cup of shaving cream to the slime mixture and knead it together
- Now that all the liquid has been absorbed, it is time to separate a bit of the slime into a ziplock bag.
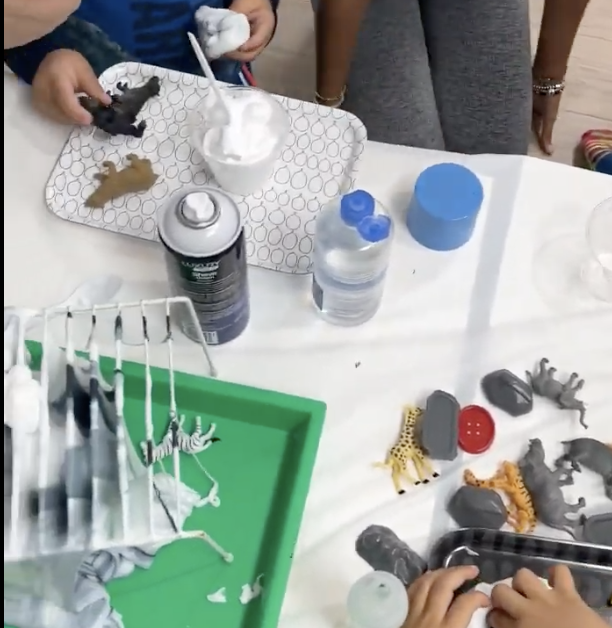
- To make black slime
- Add about 1/2 cup of slime into a ziplock back
- Add 3-5 drops of black food coloring or washable black paint
- Mix in the back to avoid getting your fingers stained
- Once it is all observed you have your black color slime ready to make the stripes of the zebra.
- Lay the stripes on a tray or add it to a drying rack to get the stripes to be mixed up
How to clean up Slime
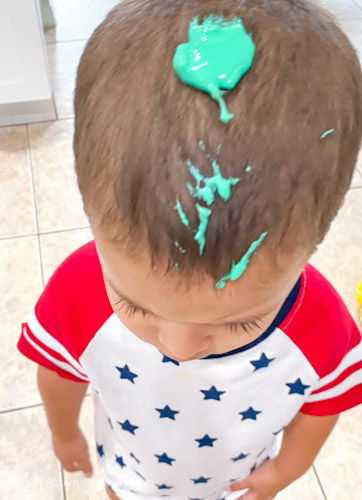
This slime is based on glue, so it will still stick to clothing or hair! So keep an eye to make sure it is used properly.
Our rule in the house is we always play using a tray and “slime stays in the tray”. This prevents them wanting to create bad habits of walking around with the slime to places they shouldn’t and falling.
But toddlers being toddlers, our first try playing with slime in a second both of our kids (in separate houses and on different days) decided to see what would happen if you put slime in the hair!
Final thoughts
Slime is a fun sensory activity for kids of all ages. This non stick slime recipe is my favorite and the safest in term of mess to use with toddlers.
It saves well so you can use it over and over again and it’s stretching as is just right for little hands.
Want more slime ideas? try our two-ingredient slime, the fluffy slime, or our favorite rainbow puffy slime.
Play together, teach them how to play safely by keeping the slime on the tray, and have fun!